DIY Three Season Room Project
Introduction:
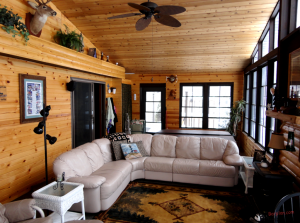
three season room with hot tub
The following post documents the planning and construction of a three-season room plan that my wife and I had built back in the summer of 2010. It was a diversion from the bar building business but has the potential to become a very cool patio bar room. It is a rather lengthy post that spans about four months. The bottom line is that you can save a lot of money building a three-season room yourself. It’s not rocket science. Nine years later, the building is still solid as a rock…knock on wood. Read on…
Building Your Own Three Season Room:
In 2009 I was quoted several prices on adding a 15′ x 30′ three-season room to the back of our converted duplex. The prices ranged from about $20,000 up to $50,000 without the roofing (shingles & tie into the existing roof). This was rather discouraging since it is not all that complicated to build for the average do-it-yourself woodworker. So, I set out to draw up my own set of plans to build a three-season room and hopefully save a substantial amount of money. I have already had some construction experience having built two garage structures solo and major basement bar renovation, so how hard could it be?
The following pages outline the project from drawing board to completion…
Initial Planning:
The first step was to devise a detailed three season room plan and design from the foundation to the top of the roof. The foundation is the most critical aspect of this type of project, so you may have to get a professional involved. I also suggest you open the phone book and have a few contractors come over to discuss the project. Who knows, you may get a super cheap deal to build it for under about 15k, but I’ll show you my approach that can have it built for well under 10k.
My material cost for the base structure is about $4,000. The roofing, which I hired a contractor to do will add another $3,000 for a total base price of $7,000. This does not include windows and doors which will add another $2,000 or so. The interior finishing will be stretched out over time as the base materials are paid off.
Three Season Room – Site Planning:
First off, this is not a plan set, it’s just a free account of our particular three-season room home patio renovation project. Enjoy!
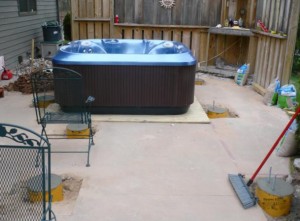
I started developing the three season room plan using a CAD program to draw up the construction plan, then began clearing the construction site. We have a hot tub that had to be drained and removed, but it will be returned in place, resting on the old patio slab with the “deck” being built around it. Of course a home bar will be included, most likely the portable EHBP-05 model.
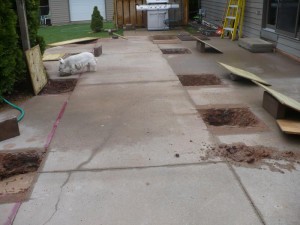
To save money and a huge chunk of labor, we are building over an existing patio slab. The first idea was to remove the whole slab then dig a perimeter trench 48″ deep, then pour a new perimeter foundation, but that alone would cost over $7,000, so we opted to use a pier foundation system instead.
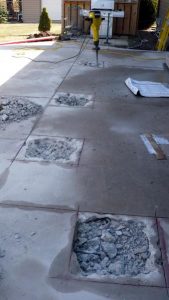
For this method, we just need to remove enough of the old slab to make access holes for the piers, plus a bit wider to allow for any frost heave. Note: We also entertained the idea of using 6″ x 6″ timbers for the foundations, placing them atop a concrete footing, and burying them in the dirt, but I soon realized that the concrete pier method is vastly superior and cheaper & easier to accomplish.
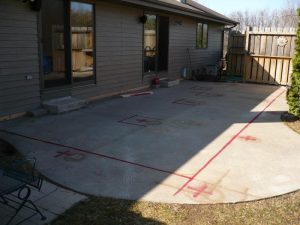
As you can see in this photo, there are 11 piers marked as squares. The red perimeter line is 1 foot smaller than the size of the room and represents the concrete we need to remove. After starting to cut, I quickly decided it would be better to just remove the concrete we had to remove and no more, so only the holes will be demoed.
This slab is about 4 to 5 inches thick and fully reinforced with re-bar. The idea that you can cut through this amount of concrete with a rental concrete saw is bunk. A rental saw with the standard $10 concrete blade will only get you down about 1″ to 2″ max. It is a good idea to score the concrete around the pier locations because once you get the proper tool on the job (a concrete breaker) it will make for nice clean holes…not that it really matters, so if you prefer to skip the concrete saw procedure, you’ll save about $100 in rental fees.
For this job, we rented an electric Bosch BOSS concrete breaker which weighs about 63 lbs.
They should call this a “backbreaker”. I suggest having a few friends give you a hand with this work and take turns sharing the demolition fun. I was able to knock out all 11 holes in one full day of rental, but I paid the price for the next two days. Too bad the hot tub is out of commission.
Three Season Room Project – March 21st, 2010:
On March 21st, 2010 we began the three-season room project. This project may help you learn how to avoid some pitfalls in the basic planning, demolition, and construction tasks and hopefully make your dream of a three-season room within reach.
Always check with your local town or village and get the proper building permits. We already had plenty of taxable living space, so the three-season room option was better than a four-season room which could substantially increase property taxes. The bland back patio area really needed a facelift and by adding the roof, screens, and vinyl windows, the hot tub will be more usable in cold snowy winter months.
During the planning stage, I had several contractors bid on this project, but they were all way overpriced while using what I considered “cheap” construction methods using SIP panels, which are fine, but not my favorite construction technique. This three-season room design uses traditional stick construction built on top of a traditional deck frame.
The roof system consists of 8 engineered trusses with a 6/12 exterior pitch and a 3/12 interior pitch which will provide a nice inside cathedral ceiling that will later be covered with cedar or bamboo boards. Since there will be a hot tub inside the structure, I am building the deck and wall framing with all pressure-treated lumber. The floor will not be decked, but rather covered in a 3/4″ treated plywood subfloor, then covered with a yet to be determined floor covering. The prices we were quoted for this project ranged from $25,000 to over $47,000. My three-season room plan will cost around $8 k to complete.
We will be using “Eze Breeze” vinyl screen windows and transom windows to prevent too many birds from crashing to an untimely death. Our current patio windows seem to be a favorite place for birds to crash & burn into. This 21-page blog series will help any do-it-yourself builder proceed on their own with confidence.
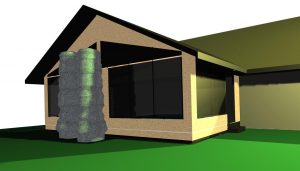
The image at the left shows the CAD rendering of the completed three-season room.
Designed for upper Midwest region (snow loading) using engineered scissor truss (6/12 – 3/12)
Room dimensions: 14′ deep x 30′ wide. 24″ overhang.
Contractor price quoted as 25k – 47k
My DIY version cost about 8 k complete.
Use this article as the basis for your own three-season room plan. It’s easier than you think and a little elbow grease will save you thousands over a contractor and will provide a nice bit of sweat equity in your home.
Follow along with us for the next few months while I (by myself) knock this project out. Click here to view all of the three-season room construction project entries. You can also see my completed 2008 Garden shed & greenhouse project post.
Now, let’s begin the actual construction…
Demolition Day:
Once everything was marked out, I spent one-day cutting concrete, which was somewhat of a wasted effort, but in the end, it helped make sure the concrete breaker impacts did not extend larger cracks away from the work area. The Bosch Brute electric concrete breaker did a great job blasting through this tough slab, but don’t bury the tip too deep because you’ll have a tough time pulling it out.
Work the concrete in small sections and keep the work area watered down a bit to hold down dust. (IMPORTANT NOTE: Don’t flood the holes with water or you may regret it later when you have to start drilling the pier holes and wind up with cookie dough clay or mud.) The Bosch unit we used operated on a 15 amp 120 VAC circuit. Just let the weight of the hammer do the work. Take turns with a friend and you’ll get more work done in a shorter period of time.
Clear the busted-up concrete out of the holes and sort the big chucks from the small, saving the small gravel side bits for later use.
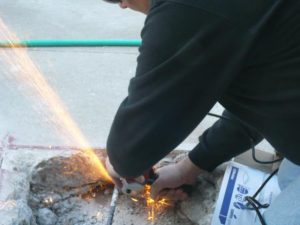
At first, I was unsure about how to cut the re-bar, and my initial thought was to use an oxy-acetylene torch to quickly blast through it. However, I do not have access to one of these, and buying one (even a small portable model) will set you back about $350. So I got out the Saws-All with some cheap metal cutting blades. I also used a cheap ($17 – Tool Shop brand) electric angle grinder with a metal cutting disk.
The angle grinder works much faster than the saw, but I suggest first using the angle grinder to cut about 3/4 of the way through the rebar, then complete the cut with the saws-all. The reason is that there is some tension of the re-bar and once you cut through, the bar can bind, tearing the flimsy cutting disk to shreds. Once you relive that tension, you can use the angle grinder for the other side cut.
Excavation Day:
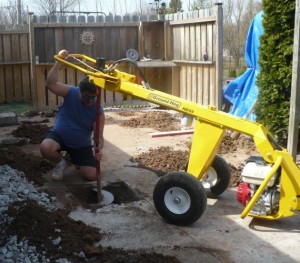
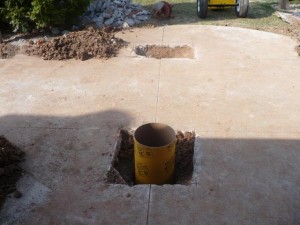
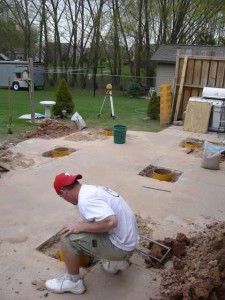
The concrete is now cleared for all 11 foundation piers, so the next step is to excavate the 12″ diameter holes for the concrete foundation piers. The piers will be formed using cardboard Sonotubes buried to a depth of 48″. This is no job for a hand post hole digger or even an ice fishing auger style post hole drill. For this job, you need something like the hydraulic Ground Hog hydraulic auger system. It easily plows through most soils and will simply stall when you hit a rock. Luckily we only hit three small rocks that were easily removed by hand.
You can rent one of these units are your local hardware store – this one rents for $100/day and was well worth the price.
The trick to handling this beast is to get two heavy people on the bar near the motor (lower right) and push down while the operator is pulling up. This makes extracting the dirt much easier for the operator. We discarded a small portion of the excavated dirt but are keeping plenty near the worksite to fill the outside of the sonotube foundations once the concrete is set up.
It’s pretty much impossible to get all the dirt out of the hole with this machine, so be sure you have a hand-type post-hole digger and possibly a hoe to clear the final amounts of dirt. I found that I really could have dug further down just to loosen the clay, but since I did not do that in some of my holes, it looks like I have about 6 to 12 more inches to dig by hand. Our clay is like cookie dough.
Once all the hole depths check out, we’ll call in the concrete guys to pour the foundations. Concrete is one thing I typically don’t mess with simply because the contractors know how to mix it properly. Nothing would be worse than to spend all this demo and excavation work only to find that my foundations are crumbling and we need to start over.
It looks like rain is in the forecast for the next few days, so the next post will be after the concrete pour. Stay tuned!
Continuing to the next step…
Construction Setback:
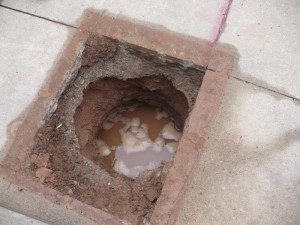
After an exceptionally dry spring, yesterday we received nearly two inches of rain. The forecast didn’t call for this much precipitation, so we just placed wood covers over the recently cleaned-out foundation holes – bad call. Once the showers subsided, we were unpleasantly surprised to find most of the holes FULL of water! The water eroded the sidewalls of the holes and basically filled them back in with wet mud & sticky clay.
Now, holes that were cleaned out to a depth of 50+ inches are now filled with about 3 feet of water and mud. This is a real setback that will require a lot more back-breaking work with the hand post hole digger.
The smart thing to do would have been to cover the entire work area with a large tarp to prevent surrounding water from draining into the holes. On the bright side, now the holes will be bigger and allow for more concrete to bell out at the bottom, creating a stronger footing. We’ll keep much of the mud to fill back around the Sonotubes once the concrete is set up. So now we wait a few days for the water to drain and to complete the re-digging process. I guess you just can’t trust the Weather Channel forecast – so any time it calls for rain, be sure to cover the holes with wood panels AND cover the entire work area with a large tarp. It will save a lot of grief in the end. Live & Learn.
The concrete pour has been delayed until next Monday. Once that is done, the real construction can finally begin. Stay tuned…
Winter’s Last Gasp:
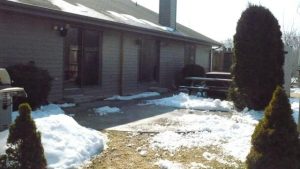
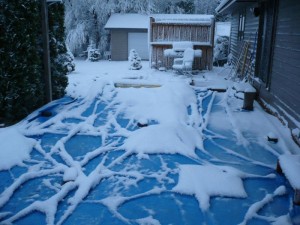
Apparently, winter feels left out of this project, so it decided to crash the party this morning by dumping 3 to 4 inches of wet snow on our construction site.
Again the weather report was calling for a light dusting of possibly up to an inch, another clean miss for the weather service. Today was to be the concrete pouring day, but after yesterday’s soaking rain and this snowy mess, we will wait till next week. Such is life in Wisconsin.
At least this time we covered all the holes with a big tarp. Now let’s hope it warms up quickly so we’ll be able to continue re-excavation.
This snow-loaded & depressed-looking Juniper tree reflects my own feelings on this recent weather-induced beat down. I’m beginning to wonder if we’ll ever get past the foundation process. What else could go wrong? Sun, Rain, Wind, Snow, Fire, Ice?
I guess it’s best to plan for the worst and have everything you need on hand, like a big tarp, ropes, bungee cords, and the like. I will set up a sun/rain tarp over the working area so we don’t have to fight the elements any further.
UPDATE: It continued to snow heavily for a few more hours and we eventually wound up with just under 6 inches of snow. Must be a record for the date. The forecast high for today is 45 degrees F. Mid 60’s by the weekend.
Trying to remain positive…
:^D
Concrete Piers Set:
After a week of wet and then snowy weather, we finally re-excavated the holes (I won’t bore you with any more of that) our concrete pro’s (Al Dix Concrete – this is the third project he’s done for me and I always rely on a professional when it comes to any concrete work) came in and set the eleven 12 inch piers in about 2 or 3 hours. I was told the concrete is 5000+ psi which is overkill for this project, but that’s typical.
Just a note on concrete – NEVER, EVER use that “quick-crete” stuff from the big box store that says to just pour it dry and add water later. If you do, your tubes will crumble into useless monuments. If you are mixing the concrete yourself, rent a concrete mixer and use Sakrete Concrete Mix 4000lb or Sakcrete Contractors 5000. Check your local codes for re-bar requirements.
According to the Sonotube instructions, these 12″ piers should support about 1,500 to 2,000 pounds per square foot in clay soil. Just an FYI: Sandy & gravel soils have a bearing resistance of 3,000 to 5,000 lbs/sf while clay soils have a lesser bearing resistance of about 1,500 to 2,000 lbs/sf.
So, if you are in clay soil, always go with the 12″ sonotubes. Only use 10″ sonotubes if you are in sandy or gravel soils. Never use 8″ sonotubes for building foundations (unless it’s a lightweight kids playhouse or jungle gym). 8″ sonotubes alone just don’t have the footprint to keep the foundation from sinking unless you are directly on bedrock or are using bell footings. Just go bigger – it’ll pay off in the end.
The hot tub is now back in its final position. It is placed on top of two sheets of 4×8 3/4″ treated plywood. This helps spread the weight a bit and acts as a cushion.
The next step is to begin framing out the floor base (deck) which will support the walls and roof structure, but we still need to wait about 7 days for the piers to cure properly. We are also waiting on the delivery of the building materials and engineered trusses.
Our weather calls for rain over the next few days, so we have covered the entire work area with a tarp to prevent too much water from ruining our freshly poured piers. No more backbreaking jackhammering or post hole digging. Stay tuned for more…
Continuing to the next step…
Building Materials Arrive:
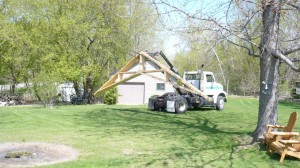
On April 22nd all the materials arrived on site, now we can begin the actual construction process. The eight 30′ wide scissor trusses are shown being carried in on a fork enabled delivery truck. The driver needed a considerable amount of skill to negotiate between trees without doing any damage. Kudos to the delivery driver and to Menards for sending what looks to be relatively straight and clean-looking lumber.
In the past we’ve had some problems with the yard workers picking warped, twisted & bark-edged lumber, we also have had some quality issues with the Midwest Manufacturing trusses, but these look OK.
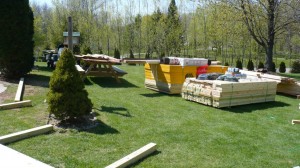
The first day consisted of sorting all the lumber into their respective piles and staging the piles by priority of assembly. Some of the base foundation beams were drilled and bolted to the sonotube foundations topped with 1/2″ treated plywood “washer” that allows for precise leveling of the deck. Some of the sonotubes appear to have settled a bit, presumably because the concrete was not fully settled in the sonotubes. This should have been done by the contractors using a vibrator or by packing the concrete down better. Oh, well, I’ll just use 3/4″ treated plywood washers on those piers.
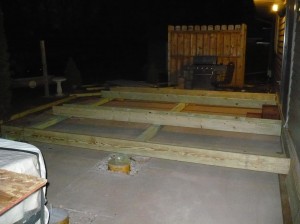
By the end of the day, we had started to lay out one side of the deck, but since more rainy weather was in the forecast, all the materials had to be covered with tarps and secured down for high winds. This night shot shows where we got on Friday. The forecast for Monday is sunny & 65 degrees F.
It looks like three days of very nice working weather in which we should be able to complete the entire deck floor structure and perhaps continue to the sidewall construction.
Depending upon weather conditions, we should have a roof on this by early May which is right on schedule.
Weather is always the one thing that will slow down the casual builder. Professionals usually work so fast that weather is much less of a factor. Plus, they have deadlines to meet. We just used bad weather days to rest our old bones and prepare for the next construction step.
Deck Framing:
It’s been almost one month since starting this three-season room project, and I gotta admit, it’s fun, but it’s kicking my ass! So far it’s been a LOT of grunt work and between the jackhammering, post hole digging, shoveling wet clay, and lugging around wet, heavy treated lumber and 3/4″ treated plywood sheets, I’m ready for a trip to the chiropractor! That or a dip in the hot tub, which has been out of service for a month.
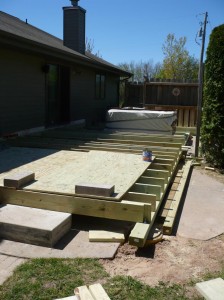
As you can see in this photo, the flooring deck is nearing completion. I’m leaving the excess hang out from the base 4×6 which may be used as a support for a step to the side entrance. For now, I am using the old concrete step. If you ever need to move a heavy concrete block like that, just think like an Egyptian, use a demo bar to lift a corner, then place some re-bar under it for rollers. Once I did that, this 400 lbs block could be moved with just my foot.
The base support now comes in handy because it allows the entire frame to slide left or right, hinged at the ledger board. This allows for easy squaring of the entire deck which is of paramount importance.
Be sure to verify that your deck is square using the old Pythagorean formula of A2+B2=C2. Just measure a fixed distance along with the ledger board, then the distance from the ledger to the outside edge. Then measure the hypotenuse and adjust as needed. This will give you a perfect right angle in the corner. If you forgot how to calculate this, just use this handy online Pythagoras Calculator (and then admit that you’re not smarter than a 5th grader). See? Math class comes in handy after all these years!
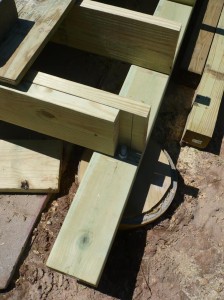
When positioning foundation piers, strict attention needs to be paid to where your anchor bolts will wind up. In a rush, I just guessed at the position, and luckily this design had enough “slop” factor to allow for a general location. However, it came very close to catastrophe as you can see in this photo.
The anchor bolt should really have been placed further to the right, but as it is, I just shortened the outside beam a bit and the bolt fits right in the pocket. The entire pier should have been a few inches to the right, but the concrete boys were in a hurry and the rain issues threw the holes off a bit. Enough excuses, the bottom line is that things worked out in the end.
Also, keep in mind that other bolts may prevent you from squaring up the frame if they are in the wrong position. Not to worry, there is always a way around it but either moving a floor truss or cutting & notching it then reinforcing with another floor truss. Just don’t rush this squaring process. Take your time and if you come across a snag, take a few minutes to think it over. There is always an easy solution. This ain’t rocket science.
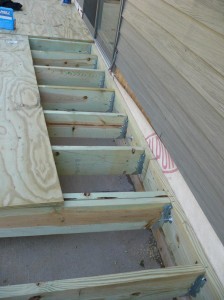
Stepping back a moment, when you start the floor truss framing, start from the ledger board. Get it level and anchored down properly then attach your trusses using truss hangars, then adjust the ends to the outside end of the floor trusses as needed. Setting the ledger board is a two-man job, but I had nobody around at the time, so I just blocked it up to where I needed it, then used a few 2 1/2″ screws to hold it in place temporarily.
Set a few trusses to verify level, then secure it to the house. I used several 5″ long 3/8″ bolts drilled through the ledger and into the house floor support band, then a few 20d nails to help out. The truss hangers work very nice and I used two screws to position them in place every 16″ and used double hangers at the floor deck seams.
Today we will continue with the deck framing around the hot tub and hopefully get it back in operation to soothe these weary old bones. For a nice change, next week we’ll proceed to construct the walls, window, and door headers and finally do work from the “upright” position which will speed things along a bit. Stay tuned…
Two Walls Up!
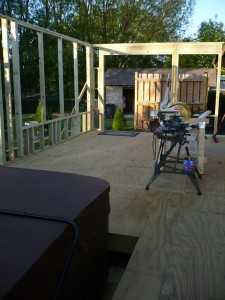
It’s been a few weeks since the last update. I haven’t been able to do any more work because of windy and/or rainy weather. The forecast for the next two weeks looks great, so the walls and roof framing should be done in the next week. Remember, this is a one-man project and wood is all pressure treated which makes it heavier. This is especially tough when lifting walls with door & window headers. Ugh!
The east wall includes headers for the door & window because this is a load-bearing wall. The scissor truss will carry the roof load only to the east & west walls. The north wall will have eight 34″ x 72″ PGT Eze breeze windows and eight matching transom windows above. The large opening in the east wall shown in the photo is for a sliding glass patio door.
Perhaps it would be a good idea to have a roof-raising party next week with brats & beer for all workers who show up and actually do some work. Problem is, everyone I know will hit the beer before doing any work. :^D
Roof Truss Setting:
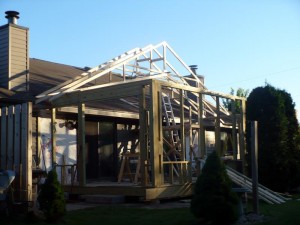
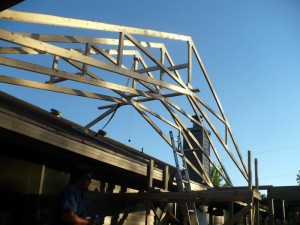
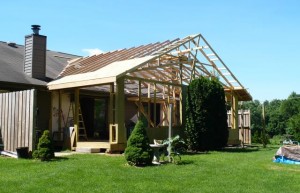
First it’s rain, snow then sweltering heat, but the three-season room truss system is finally going up. Keep in mind, this is pretty much a one-man project so far, except for the help of my wife to lift the trusses. The first truss was pretty hairy, but after the second truss, they go up fast & easy.
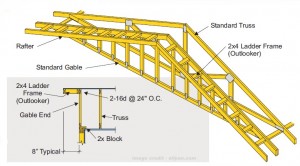
The truss is an engineered scissor-type with a 6/12 outside pitch and a 3/12 inside pitch.
Each truss weighs about 125lbs.
The trusses can be specially ordered from Menards for about $120 each.
The truss is manufactured by Midwest Manufacturing from Menards.
The hot weather has passed and we are into some more seasonable weather, so tomorrow I’ll continue with the work on the back section which is being built using standard 2 x 8 rafters. We’ll also be swinging up the last four trusses and the front ladder overhang. That should be fun.
I was a bit surprised to see that Midwest Manufacturing used 2 x 4’s in the construction of this truss, especially since it was 30 feet long, but the truss is quite sturdy and less “floppy” than you might expect.
Once it’s hung and you add a few support studs between each truss, you’ll find they become rock solid. I don’t recommend walking on the inside spans because they are not rated for a very high load.
You will see most of the work is being done using a makeshift 2 x 4 scaffold in the center of the room. This makes hanging these babies a breeze. Stay tuned!
UPDATE: looking back now three years later, this was not as easy as I made it sound. My wife thought I was crazy standing up on that flimsy homemade scaffold. I also recall having to figure out the flip method where you invert the truss, lift one side over the wall, then lift the other, then slide close to its final position and flip the truss into its upright position was not always so smooth. My wife would be on the ground trying to help by pushing with a long 2 x 4. One slip could have spelled disaster. As it was, tears were spilled (followed by laughter) along with a lot of sweat and some occasional blood. My advice? Grab a couple of cases of beer and ask your beer drinkin’ buddies to help.
Safety should always be your utmost concern. While it is nice to say you built it all by yourself, getting hurt on the job is just not an option. If I had to do the truss setting part over, I would either bring in several able-bodied workers or friends or possibly rent or hire a small crane to do the heavy lifting.
The truss raising is not difficult if done wisely, but anytime you are working more than 6 feet above the ground, be very careful.
Possibly even worse than the trusses was trying to attach the out-looker overhang framing. We’ll get to that in the next steps. It was overbuilt the first time using 2×6 framing but was way too heavy. Rebuilding it using 2×4 was much lighter and easier to hoist in place. Whew, glad that step is almost over.
Halfway done?
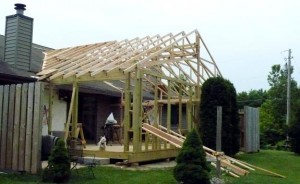
It’s been nearly two and a half months since breaking ground on my three-season room project and I am finally seeing light at the end of the tunnel. All the engineered roof trusses are up, the rear rafter wedge is complete and now all that remains is to add the two-foot overhang ladder, the fascia boards and to start sheeting the roof. The overall grunt work is pretty much done. I also need to sheet the few wall sections and the short knee wall under the main window openings. Naturally, the forecast is calling for an all-day rain event so work is shut down again.
I am hoping that by the middle of next week, we can have the roof shingled.
UPDATE: 6/12/2010 – Since this posting, it has rained every single day, some rains have been torrential. The roof areas we had to cut open for the engineered truss nearest to the house have been covered in plastic, but have allowed a small amount of water to enter and leak down to my basement home theater area. When we need rain, we can’t beg for it, now I am begging for it to stop! The next few days look like minimal rain, so maybe I can get the roof buttoned up soon!
Trudging along…
We’re going on 3 months now with this three-season room project. From the previous posts, we probably know by now that the main delay has been the weather. We need the rain but come on, enough is enough! Another big delay has been the ladder overhang on the front of the structure. It seems like I overbuilt by using 2 x 6 boards for the ladder when 2 x 4 should do just fine. The 2 x 6 ladder would have been too big & bulky and difficult to bolt onto the end truss.
The 2 x 6 trusses you see in the above photo will probably wind up as firewood. With a lighter 2×4 out-looker attached to the gable end truss, we’ll have an easier time wrestling it into place 20 feet in the air. You’ll also notice we tore down the L-shaped fence on the west side (shown). It was about time and it’s worth the new unobstructed view. The fence was also getting in the way of construction.
I per-assembled the end truss and ladder on the ground, drilling three holes in both truss and ladders for 3/8″ mounting bolts. Adding the fascia board and sheeting will hold it all together.
Once the ladder outlook is secured, and the rain stops, then we can start sheeting the roof and get on with sealing this up. The new target date for completing the roof is July 1st, 2010.
Continue to the next page…
Weather Slows Progress:
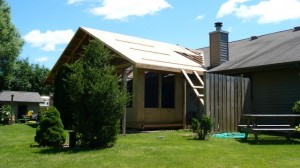
Monday’s forecast was for rain, but nothing “precipitated”, so I was able to get the fascia boards and five sheets of OSB on the roof by myself, so it’s a slow process. We got about an hour of hard rain last night, about an inch total.
Today is hot & humid, so I’m adding the hurricane straps and more fasteners in preparation for another big storm forecast for Tuesday evening and all day Wednesday. I’ll have help on Thursday and Friday which are forecast as sunny & seasonal. Might get the roofer in over the weekend. It’s starting to look like a real three-season room! – Stay tuned
Continue to the next page…
Still waiting on the weather:
Wednesday, June 23 2010: As promised, heavy weather is entering Wisconsin with torrential amounts of rainfall. Our partially completed three-season room project sits vulnerable to high winds, but I stopped adding roof sheeting in fear that not having it fully enclosed might allow for a straight line wind to lift the entire roof off.
There are only 5 sheets out of 30 in place. Radar is showing upwards of 4 to 5 inches of rain falling in just the leading edge of the storms. This makes me wonder just how much rain falls in a storm like this, so I found a cool USGS site that can answer the question. In a 1000 square mile area, which seems pretty reasonable, just 3 inches will drop an astounding 52 billion gallons of water! Check out their site to see how much rain falls during a storm.
Continue to the next page…
Roofing finally begins:
After three months of weather delays due to heavy rains, we have received a full week of clear weather, moderate temperatures, and low humidity. We were able to get all thirty-two sheets of 5/8″ OSB up onto the roof and today took delivery of the roofing materials.
As you can see in the photo, the backside of the house has a bad case of roof algae and you can see the effect that the galvanized roof vents have on eliminating that problem. The new shingles are mold-resistant and contain a small amount of zinc or copper particles to prevent this unsightly roof condition. So far we’re still on schedule for a July 4th roofing completion.
Continue to next page…
Hiring it out:
Roofing happens to be one thing I don’t do well, in fact, I don’t WANT to do it well because at 6′ 4″ and 250+ pounds, I’m definitely not made for doing any roof work, so we hired a local contractor to do the work for us. The guys who work on this crew are nothing short of amazing. They stripped the roof, repaired the chimney chase water damage, removed and patched four inoperative roof blowers and tar papered the whole roof in one day, albeit a 12-hour workday. Today they pick up and should complete the whole backside and addition.
Before you consider doing the roofing yourself, I’d highly recommend that you consider hiring a contractor who knows what they are doing and can knock this back-breaking work out fast! If you live in the central Wisconsin area, particularly in the Fox Valley, I recommend Mike & Stacey Powell from Powell Roofing Service, Inc. for fast, reliable roofing service.
Continue…
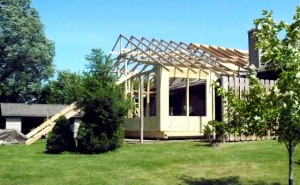
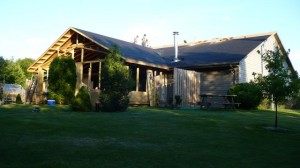
Seventy days after receiving the building materials our duplex three-season room project now sheds water. Add to that the roughly 30 days for the foundation piers and the total project time so far has been about 100 days. Keep in mind that I only worked on it about half that time due to rain, snow, and other delays and this was entirely a one-man project (and one wife to hand me tools and do cleanup).
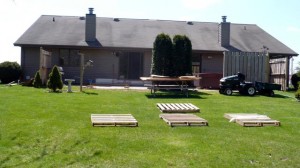
The top photo is a shot of the duplex before the materials arrived, with the foundation piers in place. Notice the roof algae on the 19-year-old back shingles and the big ugly and inoperative roof vent blowers. The back of the house had that typical “plain Jane” duplex appearance. Little did we know at the time that the base of both chimney chases were rotted and leaking water behind the chimneys. The OSB roof deck was observed to be black and completely crumbled when I removed the soffit panels in those areas, so the roof would have required repair no matter what.
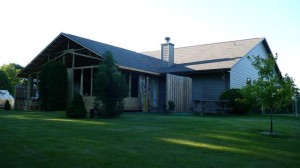
The bottom photo shows the newly constructed three-season room built on eleven 12″ foundation piers sunk 50″ into the clay.
The roof blowers have been removed and patched and the chimney chases removed and rebuilt. Now I can slow down, relax and begin dressing out the front and interior space of the three-season room. All in all, it’s a nice change to an otherwise boring-looking structure. The addition completely removes the duplex appearance and since we use this as a single-family home/office, it works out great for our needs. If we ever sell, it would be a very unique find for someone who works at home. Of course, the new room will include another home bar installation using a portable plan that is currently in the works.
The excellent roofing work was done in two days by Powell Roofing Services Inc. of Kaukauna, Wisconsin – see their website at: www.powellroofing.com
The PGT Eze-Breeze windows and doors will be ordered in the next week or two and will take 4-6 weeks for delivery.
Stay tuned for more updates in the coming months – but for now, I’m going to try to enjoy the rest of the summer.
To review the entire project, click here to see all posts – use the page navigation at the bottom of each page.
Continue…
Eze Breeze Window Installation:
After many months and many delays mostly due to extreme weather, we are expecting delivery of the main Eze Breeze patio windows and doors tomorrow. Our local dealer, Nevilles Inc. of Green Bay has been very helpful so far, visiting our worksite to take measurements for the custom-made windows.
The first order includes a 6-foot glass patio door with bronze finish, a 36″ wide Cabana door with the four-pane Eze Breeze sliders, and a total of eleven Eze Breeze window panels, two 60″ x 36″, one 60″ x 38″ and eight 72″ x 34″ panels. The only remaining work will be the triangular transom windows above the main windows. The transom windows will also be made with the flexible Eze Breeze window glazing.
Why did we choose to go with Eze Breeze Windows? The biggest reason is cost, but we also needed performance to fit with a three-season room. Our entire order for windows and doors (less the transoms) was just under $4000. The transoms will add about $300 to the job.
We really don’t need high-performance insulation, just a way to block the wind and rain and to keep out the bugs. The added upside with these windows is the flexible glazing material that is virtually unbreakable and easy to replace if needed. The other big advantage is the ability to open each window to 75%, giving us more airflow when needed. This is not possible with any of the glass window systems we considered.
We also have a lot of birds in our backyard and over the past few years, many have crashed & burned into our glass patio doors. The Eze Breeze window glazing is bird-friendly providing a measure of “give” to absorb shock. We also won’t have to worry about Frisbees, golf balls, or baseballs crashing through our windows.
Stay tuned and we’ll post more photos as the windows are installed.
The project started March 2oth 2010 – number of workers – one (excluding roofing shingle installation which was performed by a local roofing contractor).
Continue to next page…
Finishing Up:
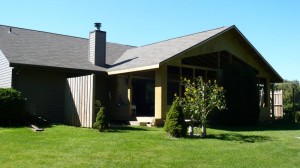
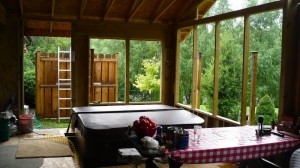
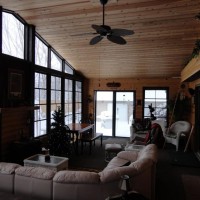
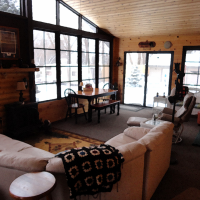
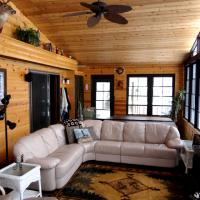
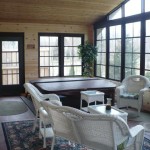
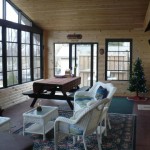
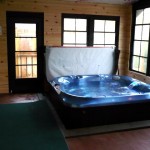
Starting from late March 2010 to New Years’ day 2011, it’s been a challenging and fun project. Here are a few shots of the inside with pine tongue and groove walls and red cedar tongue & groove ceiling. The ceilings are bare cedar (cedar is naturally water repellent so don’t treat it with anything). The pine has one coat of sanding sealer (wax-free shellac) and one coat of oil-based outdoor urethane. There is still a small amount of exterior siding and trim work to be completed….next spring. Enjoy the pics.
Taxes:
If you are wondering about any property tax implications, it really has not added much per year. As long as the room is unheated, it is considered three-season use or an enclosed porch. Even if it bumps your taxes up a tiny bit, it’s well worth it and increases your property value!
- three season room in 2013
- three season room on duplex
- three season room with hot tub
Earlier photos…
The end…
Update: 4 years later and no problems whatsoever, even through the coldest winter on record in 2013/14. Exterior has been finished long ago.




I have not cleaned them once in 13 years. Still solid framing and pliable glazing.
I’ll send some pics soon.
how are the vinyl pane windows holding up. have they yellowed? Do you need to clean them regularly? Any regrets?
The base is 3/4″ treated plywood. That was then painted, then simply covered with indoor-outdoor carpet.
What type of flooring did you use?
I live down in Beaver Dam and am really interested. I heard they get cloudy. You just wash with water? Do you remove the panels before washing in the sink? Do you air dry or dry with a soft cloth? Our porch will be about 12 ft 8 inches by 20. with windows on three sides. On a scale for one to ten….at least 8.5 satisfied? What is the biggest down side?
The windows are still doing great after 7 years in the upper Midwest. They’ve seen heavy winds, ice storms, snow, wide temperature fluctuations and still as solid as the day we put them in. They’ve also seen a lot of bird strikes and no damage to either the windows or happily for them, the birds. Of course they get dirty just like any window and clean up fast with just soapy water. You’ll love them.
Thanks so much for this post! I am most likely going to be ordering eze breeze windows tonight to enclose our large breezeway. It collects so much debris (leaves, grass, dirt) that blows in from around the neighborhood. Not to mention birds love to hang out under it and make messes on the furniture. So I’m hoping to keep the breezy feel, without all the mess and bugs. I’m also hoping we can use it as a mudroom to store our wet winter boots and such. I’ve had to remove my upholstered bench because it was getting too wet from rain blowing in and it was ruining it. So I’m hoping this would keep the rain out.
I was wondering how well your eze breeze windows have done to block the elements? Also, how have they held up now that it’s been a few years? Thanks!